Welcome to our delicious journey of Canning Cranberry Juice! If you’re looking for a refreshing, tart beverage that captures the essence of autumn, you’ve come to the right place. Cranberries, with their bright red hue and tangy flavor, are not just for Thanksgiving sauces or holiday desserts; they can also be transformed into a delightful juice that you can enjoy all year round. This article will guide you through the process of canning cranberry juice, ensuring that you can savor this delightful drink long after the cranberry harvest is over.
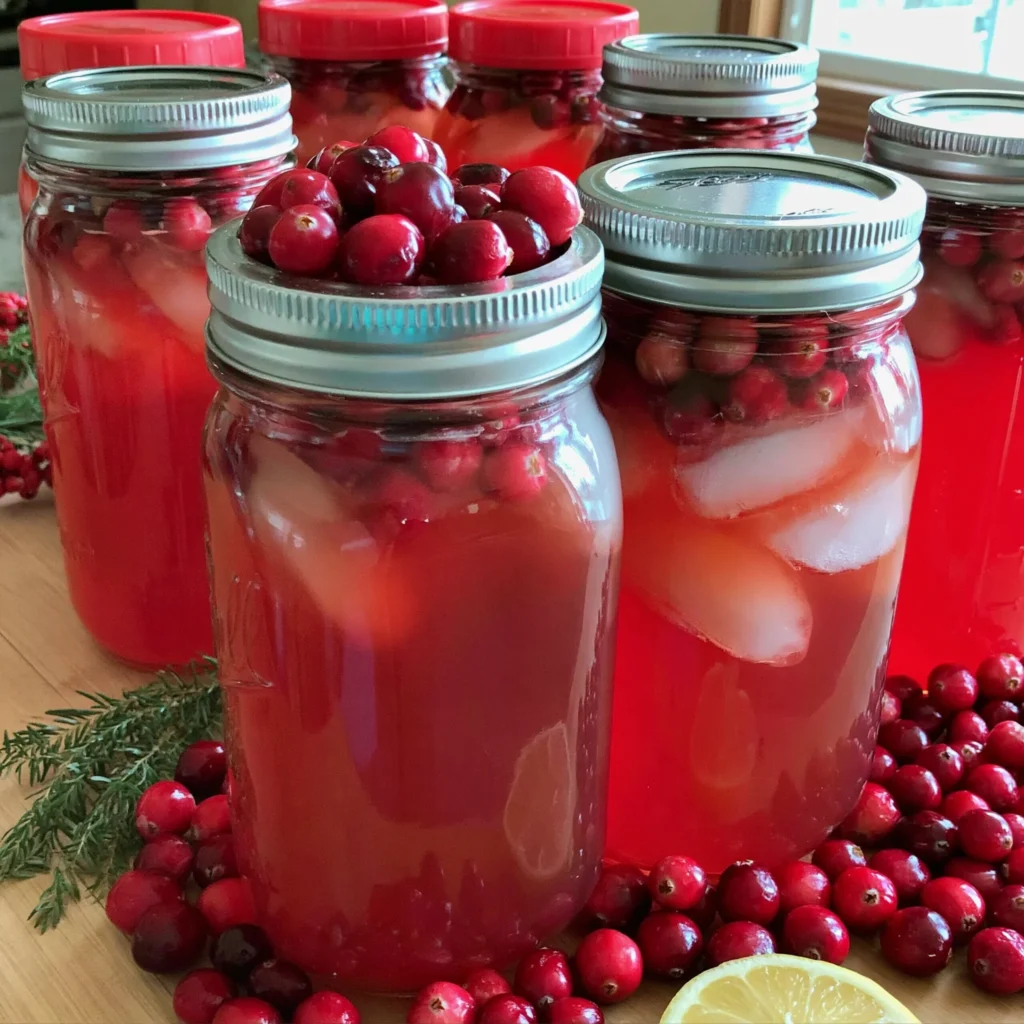
But why should you can cranberry juice? Canning allows you to preserve the freshness and flavor of cranberries, providing you with a nutritious drink that can boost your immune system and support your overall health. Plus, it’s incredibly satisfying to see your jars lined up on the shelf, a testament to your culinary skills. Let’s dive into why you will absolutely love this recipe!
Why You’ll Love This Recipe
Canning cranberry juice is not only easy but also rewarding. Here are several reasons why this recipe will become a staple in your kitchen:
- Health Benefits: Cranberries are packed with antioxidants, vitamins, and minerals. They’re known to support urinary tract health and improve heart health. By canning your own juice, you can enjoy these benefits without any added preservatives or artificial flavors.
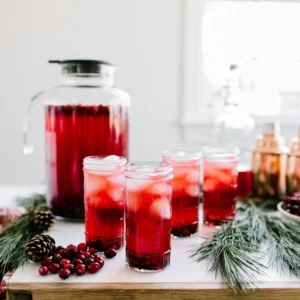
- Versatile Usage: This juice can be enjoyed on its own or used as a base for cocktails, smoothies, and salad dressings. You can even mix it with soda water for a refreshing fizzy drink!
- Seasonal Enjoyment: Canning allows you to capture the essence of cranberries during their peak season, making it possible to enjoy their flavor throughout the year.
- Cost-Effective: Making your own cranberry juice is often more economical than purchasing pre-made juice from the store, especially if you buy cranberries in bulk.
- Eco-Friendly: Home canning reduces waste since you can reuse jars and avoid single-use plastic bottles.
Now that you know the amazing benefits of canning cranberry juice, let’s explore why you should try this recipe today!
Why You Should Try This Recipe
This recipe for Canning Cranberry Juice stands out for several compelling reasons:
- Simplicity: The process is straightforward, making it accessible for both novice and experienced canners. With just a handful of ingredients, you can create something truly delightful.
- Customization: You can adjust the sweetness to your preference by varying the amount of sugar you add. Want a tart juice? Reduce the sugar! Prefer it sweeter? Increase it! The choice is yours.
- Family Tradition: Canning can be a wonderful family activity. Gather your loved ones, share stories, and create memories while making this juice together.
- Long Shelf Life: Properly canned cranberry juice can last for up to a year in your pantry, providing you with a delicious drink whenever you want it.
- Impressive Gift: Homemade canned juice makes a thoughtful and impressive gift. Share your creations with friends and family during the holidays or special occasions.
With these reasons in mind, it’s time to gather your ingredients and utensils. Let’s see what you’ll need for this delightful canning adventure!
Ingredients and Utensils Needed
Ingredients
- 4 quarts of fresh cranberries: Choose firm, plump berries. Fresh cranberries are typically available in the fall, making it the perfect time to stock up.
- 4 cups of sugar: This can be adjusted to taste, but sugar helps balance the tartness of the cranberries.
- 8 cups of water: This is used to extract the juice from the cranberries.
Utensils
- Large pot: You’ll need a pot large enough to hold all the cranberries and water. A stockpot works well.
- Fine-mesh sieve or cheesecloth: This is essential for straining the cranberry mixture to extract the juice.
- Canning jars and lids: Opt for pint or quart-sized jars, depending on your preference. Ensure they are sterilized before use.
- Jar lifter: This tool is helpful for safely removing hot jars from the boiling water bath.
- Funnel: A canning funnel will help you pour the juice into jars without making a mess.
- Clean cloth: Use this to wipe the rims of the jars before sealing them.
- Boiling water canner: This is used for processing the jars to ensure they seal properly.
Having the right ingredients and utensils is crucial for a successful canning process. Make sure to gather everything before you begin to ensure a smooth experience!
Detailed Recipe Steps
Now that you have all your ingredients and tools, let’s get started with the detailed steps for Canning Cranberry Juice:
- Rinse the cranberries: Start by rinsing the fresh cranberries under cold water. Remove any stems or damaged berries. This ensures that only the best fruit makes it into your juice.
- Prepare the mixture: In a large pot, combine the cranberries with 8 cups of water. Bring the mixture to a boil over medium heat. This process helps release the juices from the cranberries.
- Simmer: Once boiling, reduce the heat and let it simmer for 10-15 minutes. You will notice the cranberries bursting and softening. This is a crucial step as it maximizes the juice extraction.
- Cool slightly: Remove the pot from heat and allow it to cool slightly. This makes it easier to handle when straining.
- Strain the mixture: Set a fine-mesh sieve or cheesecloth over another pot. Pour the cranberry mixture through it, pressing the solids to extract as much juice as possible. This step is vital for ensuring you get all that delicious cranberry flavor.
- Add sugar: To the extracted juice, add 4 cups of sugar. Stir until it’s fully dissolved. This will help balance the tartness of the cranberries and enhance the flavor.
- Bring to a boil: Once the sugar is dissolved, bring the juice back to a boil. Let it simmer for an additional 5 minutes to ensure everything is well combined and heated through.
- Sterilize jars: While the juice is simmering, sterilize your canning jars and lids by placing them in boiling water for a few minutes. This step is crucial in preventing spoilage.
- Fill the jars: Using a funnel, carefully pour the hot cranberry juice into the sterilized jars, leaving about 1/2 inch of headspace. This is important for proper sealing.
- Wipe the rims: Use a clean cloth to wipe the rims of the jars. This removes any residue that might prevent a proper seal.
- Seal the jars: Place the lids on the jars and screw on the bands until they are fingertip-tight. Don’t over-tighten, as air needs to escape during processing.
- Process the jars: Process the jars in a boiling water bath for 15-20 minutes. This ensures proper sealing and safety for long-term storage.
- Cool the jars: Once the processing time is complete, carefully remove the jars from the boiling water bath using a jar lifter. Let them cool completely on a clean towel or cooling rack.
- Check the seals: After the jars have cooled, press the center of each lid. If it does not pop back, the jar has sealed properly. If it does pop back, refrigerate and consume that jar first.
Following these steps will guide you to successfully can your own cranberry juice, making it a delightful addition to your pantry. Remember to take your time and enjoy the process!
Tips and Variations
While the basic recipe for Canning Cranberry Juice is fantastic as is, here are some tips and variations to enhance your experience:
- Adjusting sweetness: Feel free to experiment with the amount of sugar used. You can use honey, agave syrup, or even stevia for a healthier alternative.
- Flavor infusions: Consider adding spices like cinnamon, cloves, or ginger during the simmering process for a unique flavor profile. These spices complement the tartness of the cranberries beautifully.
- Vegan option: The recipe is naturally vegan, but always check your sweetener if you choose to substitute it.
- Gluten-free: This recipe is gluten-free, making it suitable for everyone!
- Avoiding common mistakes: Ensure your jars are properly sterilized and that you leave enough headspace when filling. This will help avoid spoilage and ensure a good seal.
By incorporating these tips and variations, you can personalize your cranberry juice to suit your taste preferences and make the canning process even more enjoyable!
Nutritional Values and Benefits
Understanding the nutritional value of the ingredients in your Canning Cranberry Juice is essential for appreciating its health benefits. Here’s a breakdown of the key nutritional components:
- Cranberries: Low in calories, cranberries are a powerhouse of antioxidants. One cup (about 100g) contains approximately 46 calories, 0.1g of fat, 12g of carbohydrates, 1g of protein, and 4g of dietary fiber.
- Sugar: While sugar adds sweetness, it’s important to consume in moderation. You can adjust the quantity based on your dietary needs.
- Water: Hydration is key! Water plays a crucial role in metabolism and overall health.
Cranberries have been linked to various health benefits, including:
- Urinary tract health: Cranberry juice is often consumed to help prevent urinary tract infections.
- Heart health: The antioxidants in cranberries can help reduce the risk of heart disease.
- Digestive health: The fiber in cranberries promotes healthy digestion.
By canning your own cranberry juice, you not only create a delicious beverage but also contribute to your health and well-being. Enjoy it as part of a balanced diet!
Frequently Asked Questions
How long does canned cranberry juice last?
Properly canned cranberry juice can last for up to a year when stored in a cool, dark place. Always check for signs of spoilage before consuming.
Can I use frozen cranberries for canning?
Yes, you can use frozen cranberries for canning. Just ensure they are thawed and rinsed before proceeding with the recipe.
Is it necessary to sterilize jars for canning?
Yes, sterilizing jars is essential to prevent spoilage and ensure a proper seal during the canning process.
Can I can cranberry juice without sugar?
Yes, you can can cranberry juice without sugar or use alternative sweeteners. Just keep in mind that sugar helps preserve the juice.
What can I do with leftover cranberry pulp?
Leftover cranberry pulp can be used in smoothies, baked goods, or even homemade cranberry sauce. Don’t let it go to waste!
Conclusion
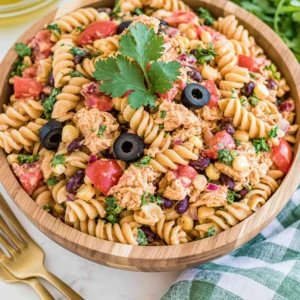
In conclusion, Canning Cranberry Juice is a delightful and rewarding process that allows you to enjoy the tart, refreshing flavor of cranberries year-round. With simple ingredients and easy steps, you can create a nutritious and delicious beverage that is perfect for any occasion. Don’t hesitate to share your experiences or ask any questions in the comments below! For more delicious recipes, check out Dill Pickle Bacon Pasta Salad or Deviled Eggs Pasta Salad for treats you will love!
For more inspiration, be sure to visit our Pinterest page where we share a variety of delicious recipes. Happy canning!

Canning Cranberry Juice
Ingredients
Equipment
Method
- Step 1: Rinse the cranberries under cold water. Remove any stems or damaged berries.
- Step 2: In a large pot, combine the cranberries with 8 cups of water. Bring to a boil over medium heat.
- Step 3: Reduce heat and let it simmer for 10-15 minutes until cranberries burst.
- Step 4: Remove from heat and let cool slightly.
- Step 5: Strain the mixture through a fine-mesh sieve or cheesecloth, pressing solids to extract juice.
- Step 6: Add 4 cups of sugar to the extracted juice and stir until dissolved.
- Step 7: Bring the juice back to a boil and simmer for an additional 5 minutes.
- Step 8: Sterilize your canning jars and lids in boiling water.
- Step 9: Fill the sterilized jars with hot cranberry juice, leaving 1/2 inch of headspace.
- Step 10: Wipe the rims of the jars with a clean cloth.
- Step 11: Seal the jars with lids and screw on the bands until fingertip-tight.
- Step 12: Process the jars in a boiling water bath for 15-20 minutes.
- Step 13: Carefully remove the jars and let them cool completely.
- Step 14: Check the seals by pressing the center of each lid.